First Ever Test of the 3.5 Liter Syringe Extruder

My last post showed how I made a plunger for a 3.5 liter syringe.  Today’s post is the results of the first ever test of that syringe assembly including the plunger.  The goal of the test was to determine if the syringe pusher would be able to push very thick, viscous paste (sort of like melted chocolate) out of the 1/4″ syringe nozzle.  It was also a test of the ability of the previously made silicone plunger to maintain a seal even against whatever pressure develops inside the syringe as it is pushing.

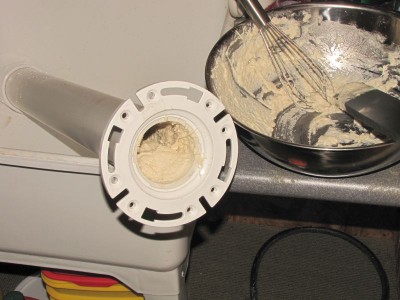
I mixed about 1 liter of extra thick pancake batter to a consistency that I thought would be much thicker than molten chocolate (pancake batter is much cheaper than chocolate) and shoveled it into the syringe, then bolted on the pusher and hooked it up to a power supply:

Looking back, I probably should have loaded the syringe from the other end.

Syringe loaded with super thick pancake batter.

Syringe loaded with super thick pancake batter.


Here’s the actual test.  It gets especially interesting about 1 minute in:

The syringe continued drooling after power was removed due to air that was trapped inside the syringe.  As the plunger pushed, the air was compressed.  When the motor stopped the compressed air continued to push out the batter.  I will have to be careful to eliminate air bubbles in the material when it comes time to use this in a printer.

It only took a couple minutes to clean out the syringe after the test was done.

The pusher did its job much better than expected, and the plunger held up just fine, too.  I feel confident that this device will be able to extrude chocolate.   Now the real work begins…
Son of MegaMax Lives!

MegaMax was a great 3D printer, but it was time for some changes.  He was difficult to transport because the electronics were in a separate housing with many cables to disconnect and reconnect, barely fit through doorways, and required a positively gargantuan enclosure to keep the temperature up to control ABS delamination.  Though it hurt to do it, I tore him apart and did a complete redesign/build into a form that is more like what I would have done had I known anything at all about 3D printing when I started building MegaMax.

I reused what I could including a lot of the 8020 extrusions in the frame, the Z axis screw assemblies and drive belt, and the X and Z axis motors.

Changes include:

  • ball screw drive Y axis with high torque motor- precise but noisy
  • linear guides in X and Y axes instead of 1/2″ round guide rails and linear bearings
  • SmoothieBoard controller instead of Arduino/RAMPS
  • BullDog XL extruder and E3D v6 hot end
  • RepRapDiscount graphic LCD control panel
  • narrower frame design without giving up print volume- easier fit through doorways!
  • polycarbonate panels to enclose the print area yet provide a clear view of the print
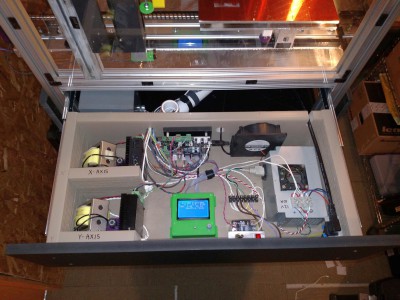
  • electronics in a drawer for easy service and transport and neater appearance
  • DSP motor drivers and 32V power supplies for X and Y axes
  • Liberal use of screw terminals to make servicing easier
  • Modular X and Y axes that can be removed for service and replaced in minutes.

SoM will be making his public debut at the Milwaukee Makerspace very soon…

Son of MegaMax electronics drawer

Son of MegaMax electronics drawer

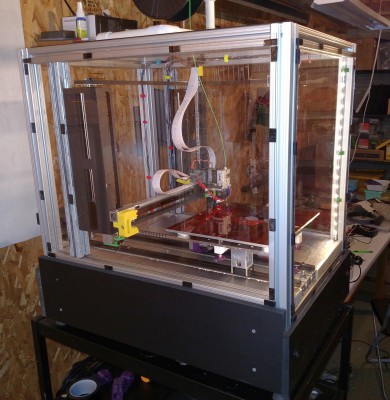
Side view of Son of MegaMax

Side view of Son of MegaMax


Scrap Yard Success

Yesterday some of us went on a little field trip to a couple local scrap yards.  We met the people there and learned the ropes of how to do things right and not get hurt while digging for treasure in the piles of stuff they have laying around.  Wear gloves, old clothes, safety glasses, and sturdy shoes!  Stay away from moving cranes!

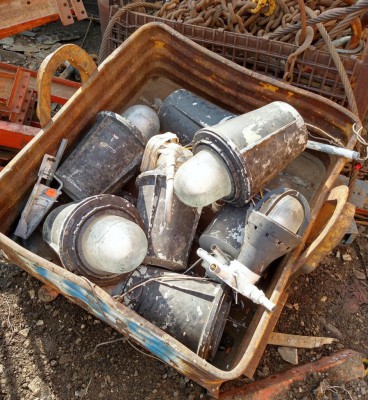
Here’s one of the discoveries from yesterday’s trip- explosion proof mercury vapor light fixtures:

A pallet full of explosion proof lamps at the scrap yard.

A pallet full of explosion proof lamps at the scrap yard.

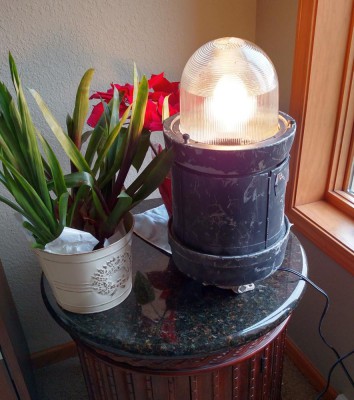
And here’s what can be done with about an hour to figure out how to get it apart to remove the mercury vapor lamp and ballast and  clean it up a little.  Another 10 minutes went into installing the hardware, wiring, and a 6W LED bulb.  I wouldn’t call it finished yet- the base is crying out for installation of pipes to act as feet, a little more cleanup, and maybe a dimmer switch.  Total invested: $18 to get the fixture from the scrap yard, and another $12 for the hardware and LED bulb.

Explosion proof industrial lamp turned into table lamp.

Explosion proof industrial lamp turned into table lamp.

Further Adventures in 3D Printer Upgrades (upgrades?)

As previously promised, MegaMax’s Y-axis has been converted to screw drive along with the addition of a larger motor, DSP based driver, and 32V power supply.  The SmoothieBoard arrived and was quickly swapped in to replace the ATMega2560/RAMPS combo.  After studying and configuring the Smoothieboard I attempted a few test prints.  That’s when the problems started.

32V Power supply for Y axis motor.  No regulation necessary!

32V Power supply for Y axis motor. No regulation necessary!


Smoothieboard is supposed to read the config.txt file from its uSD card (conveniently accessible via USB) every time it boots.  That makes changing configuration very easy and fast – all you do is edit the config.txt file, save it , and reboot the board.  Firmware is updated the same way.  With the ATMega2560 you have to find the configuration variables by searching through multiple configuration files, make the necessary changes, recompile the firmware, then flash the controller.  I said the SmoothieBoard is supposed to read the file every time it boots, but it wasn’t doing it.  I’d make changes and they would not appear in the behavior of the printer.  Hmmmm.

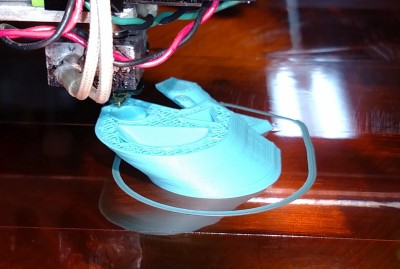
Layers kept shifting in the X-axis- I expected Y-axis problems, but not X!

Layers kept shifting in the X-axis- I expected Y-axis problems, but not X!


I attempted some prints and managed to get two decent ones in about a week of screwing around with it.  I tried dozens of combinations of speed, acceleration, junction deviation (smoothie-speak for jerk) and even tried different slicers.  The machine went completely nuts on two occasions and ignored the Z-axis limit switch and slammed the extruder into the print bed, gouging through the Kapton tape and into the aluminum!  I decided I needed some professional help so I got on the #smoothieware IRC channel and discovered that the developers of the board/firmware hang out there quite a lot.  After a lot of back and forth Q and A and testing someone suggested it might be the uSD card causing the problem.  I picked up a new card at Walmart, put the firmware and config files on it , booted the machine, and attempted a print.  PERFECT!

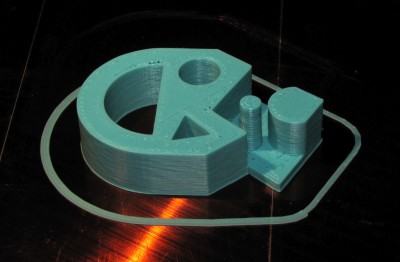
The new uSD card worked!  The small round post is 4mm diameter.

The new uSD card worked! The small round post is 4mm diameter.


I have made several prints since last night and they have all come out fine.  I still have a little tweaking to do and to test the limits of the machine’s performance, but I think the problems are behind me.

Next up:  X-axis redesign/build.  I’m replacing the two guide rails with a single linear guide.  I have also ordered and received a BullDog XL extruder to replace the hacked up QUBD unit I’ve been using.  I’ll be adding a DSP driver and 32V power supply for the X-axis motor, too.

After that, I have some ideas for a filament respooling machine and ways to fix the retraction problem in the SnakeBite extruder.

It never ends!