Sunday Morning Project – A 3D Printed WebCam Mount for a Telescope

I recently acquired a new eyepiece to replace the damaged one that came with the Meade ETX-90 telescope I bought at a swap meet last year.  I decided it needed to have a web-cam mount so I designed and printed one that is a variation of a previous design for a microscope.  It took about 20 minutes to recreate the CAD file in DesignSpark Mechanical, and about 90 minutes to print on Son of MegaMax.

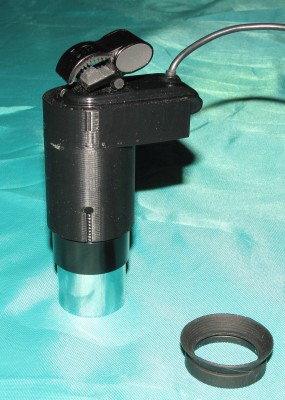
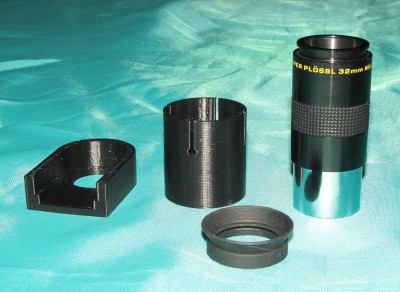
This thing has an odd shape to accommodate the odd shape of the camera.  I designed the adapter in two pieces so it could be printed without any support material.  After printing the two pieces were glued together with a little super glue.

Unassembled 3D printed WebCam adapter and eyepiece.

Unassembled 3D printed WebCam adapter and eyepiece.


Assembled adapter on the eyepiece.

Assembled adapter on the eyepiece.


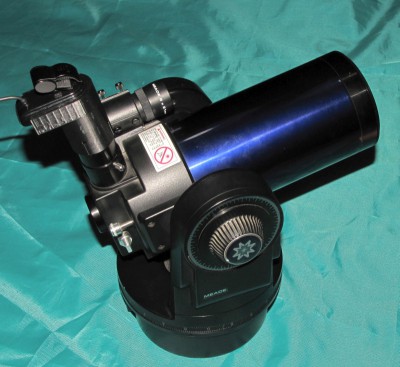
Telescope with WebCam mounted.

The adapter fits over the barrel of the 32mm fl eyepiece and stays put.


I shot a short video to test it and it works perfectly!  The cars driving by are about 1/2 mile away.


If we ever get a clear night I’ll try shooting Jupiter or Saturn and then run Registax to enhance the images.

Files are here:  https://www.youmagine.com/designs/web-cam-adapter-for-meade-telescope-eyepiece

Son of MegaMax Lives!

MegaMax was a great 3D printer, but it was time for some changes.  He was difficult to transport because the electronics were in a separate housing with many cables to disconnect and reconnect, barely fit through doorways, and required a positively gargantuan enclosure to keep the temperature up to control ABS delamination.  Though it hurt to do it, I tore him apart and did a complete redesign/build into a form that is more like what I would have done had I known anything at all about 3D printing when I started building MegaMax.

I reused what I could including a lot of the 8020 extrusions in the frame, the Z axis screw assemblies and drive belt, and the X and Z axis motors.

Changes include:

  • ball screw drive Y axis with high torque motor- precise but noisy
  • linear guides in X and Y axes instead of 1/2″ round guide rails and linear bearings
  • SmoothieBoard controller instead of Arduino/RAMPS
  • BullDog XL extruder and E3D v6 hot end
  • RepRapDiscount graphic LCD control panel
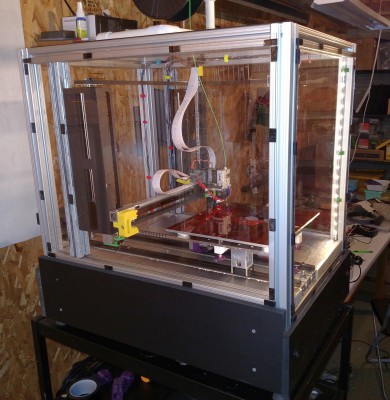
  • narrower frame design without giving up print volume- easier fit through doorways!
  • polycarbonate panels to enclose the print area yet provide a clear view of the print
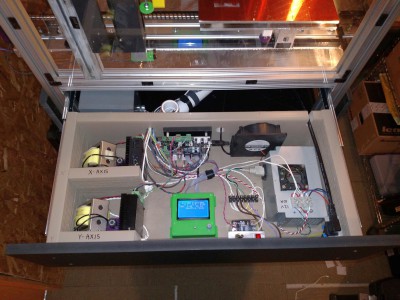
  • electronics in a drawer for easy service and transport and neater appearance
  • DSP motor drivers and 32V power supplies for X and Y axes
  • Liberal use of screw terminals to make servicing easier
  • Modular X and Y axes that can be removed for service and replaced in minutes.

SoM will be making his public debut at the Milwaukee Makerspace very soon…

Son of MegaMax electronics drawer

Son of MegaMax electronics drawer

Side view of Son of MegaMax

Side view of Son of MegaMax


Further Adventures in 3D Printer Upgrades (upgrades?)

As previously promised, MegaMax’s Y-axis has been converted to screw drive along with the addition of a larger motor, DSP based driver, and 32V power supply.  The SmoothieBoard arrived and was quickly swapped in to replace the ATMega2560/RAMPS combo.  After studying and configuring the Smoothieboard I attempted a few test prints.  That’s when the problems started.

32V Power supply for Y axis motor.  No regulation necessary!

32V Power supply for Y axis motor. No regulation necessary!


Smoothieboard is supposed to read the config.txt file from its uSD card (conveniently accessible via USB) every time it boots.  That makes changing configuration very easy and fast – all you do is edit the config.txt file, save it , and reboot the board.  Firmware is updated the same way.  With the ATMega2560 you have to find the configuration variables by searching through multiple configuration files, make the necessary changes, recompile the firmware, then flash the controller.  I said the SmoothieBoard is supposed to read the file every time it boots, but it wasn’t doing it.  I’d make changes and they would not appear in the behavior of the printer.  Hmmmm.

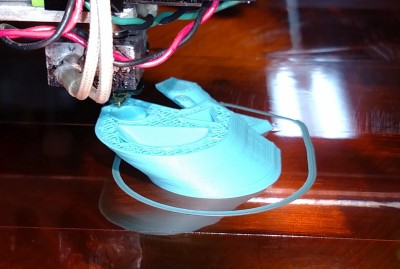
Layers kept shifting in the X-axis- I expected Y-axis problems, but not X!

Layers kept shifting in the X-axis- I expected Y-axis problems, but not X!


I attempted some prints and managed to get two decent ones in about a week of screwing around with it.  I tried dozens of combinations of speed, acceleration, junction deviation (smoothie-speak for jerk) and even tried different slicers.  The machine went completely nuts on two occasions and ignored the Z-axis limit switch and slammed the extruder into the print bed, gouging through the Kapton tape and into the aluminum!  I decided I needed some professional help so I got on the #smoothieware IRC channel and discovered that the developers of the board/firmware hang out there quite a lot.  After a lot of back and forth Q and A and testing someone suggested it might be the uSD card causing the problem.  I picked up a new card at Walmart, put the firmware and config files on it , booted the machine, and attempted a print.  PERFECT!

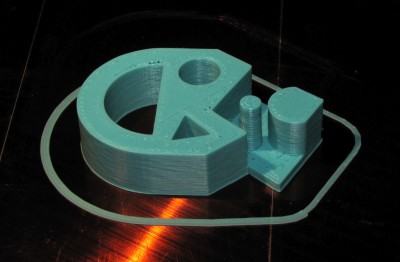
The new uSD card worked!  The small round post is 4mm diameter.

The new uSD card worked! The small round post is 4mm diameter.


I have made several prints since last night and they have all come out fine.  I still have a little tweaking to do and to test the limits of the machine’s performance, but I think the problems are behind me.

Next up:  X-axis redesign/build.  I’m replacing the two guide rails with a single linear guide.  I have also ordered and received a BullDog XL extruder to replace the hacked up QUBD unit I’ve been using.  I’ll be adding a DSP driver and 32V power supply for the X-axis motor, too.

After that, I have some ideas for a filament respooling machine and ways to fix the retraction problem in the SnakeBite extruder.

It never ends!


Update on the Never-Ending Printer Project

I installed the Y-axis screw drive in MegaMax using the old NEMA-23 stepper motor.  A couple really good things came from this:

1) I can now adjust the bed leveling screws from the underside of the bed using thumbwheels instead of a screw driver.  I know, I know, everyone else in the world has been able to do this from day 1…
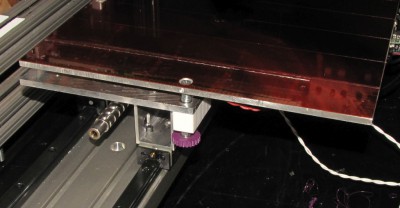
Thumb screw for leveling print bed.   Screw is threaded into teflon block.

Thumb screw for leveling print bed. Screw is threaded into teflon block.


2) Unlike everyone else in the world, with fully supported linear guide rails, the print bed does not move in any direction but along the Y axis.  In the old scheme, with the end-supported round guide rails, the rails would flex and the bed would move up and down when applying pressure to it (sometimes even the screw driver pressure to adjust the bed leveling screws).  Now, if the bed moves at all in the vertical direction it’s because the bed plate (1/4″ aluminum) itself is flexing!

A couple bad things were also discovered:

1) The vibration and noise problem I was hoping to solve has not been solved.  It has been made worse, though the character of the noise is improved to musical tones instead of just harsh buzzing and rattling.

2) Several failed test prints at ever decreasing jerk, acceleration, and speed settings have demonstrated that the old motor simply doesn’t have enough torque to drive the screw reliably at reasonable printing speeds.
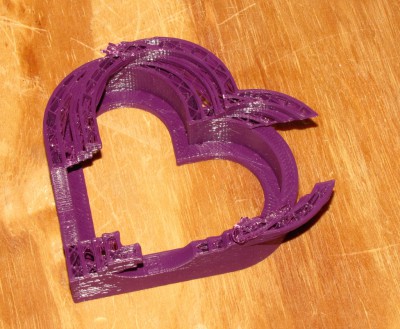
Shift occurred in Y-axis due to insufficient motor torque.

Shift occurred in Y-axis due to insufficient motor torque.


Further research into the first problem indicates that the vibration and noise are inherent in using steppers, and worse in MegaMax than in machines that use NEMA-17 motors because of the higher detent torque in the NEMA-23 size motors.  Detent torque is the little bump-bump you feel when you turn the motor shaft by hand.  The solution to the problem is to use a good driver for the motor and a higher voltage power supply.  The little A4988 chips in the Pololu drivers on the RAMPS board are very unintelligent- all they do is provide microstepping.  They work OK for NEMA-17 size motors because of the speeds and low detent torques in those motors.  When used with NEMA-23 motors the driver limitations become apparent – as they have in MegaMax- lots of noise and vibration.

Good stepper drivers are DSP based and automatically sense resonance and damp it electronically.  They use phase controlled sine wave currents to drive the motors smoothly.  Fortunately, DSP stepper drivers for NEMA-23 size motors are pretty cheap.   Here’s video of the DM542a driver pushing a NEMA-23 motor around.  I have ordered a DM542a driver.

The best power supply for stepper drivers is not a switcher, and running steppers from a switching supply will often result in a dead power supply.  I will be building a simple, unregulated transformer, rectifier, and filter cap supply to go with the new driver.

Next came the question of how to determine how much torque is needed to properly drive the Y-axis.  A bit of research took me here: Motor size calculator.  You just select the scheme for which you want to size the motor, enter the appropriate data, and it magically tells you how much torque you need to do the job.  When I ran the numbers on MegaMax, it told me that I need about 350 oz-in of torque (about double the torque of the motor I have).  I did a quick search and found a Chinese made (of course) 425 oz-in motor for $50.  Also on order…

The motor mount I am using is designed for a NEMA-34 size motor with which I use an adapter plate to allow the NEMA-23 motor to fit.  Since I’m buying a new motor anyway, why not just get a NEMA-34 motor?  It turns out that the best stepper for the job is generally the smallest motor that can provide the necessary torque.  A NEMA-34 motor could provide much more torque but the detent torque and rotor inertia would work against smooth and fast operation, and require a bigger power supply.
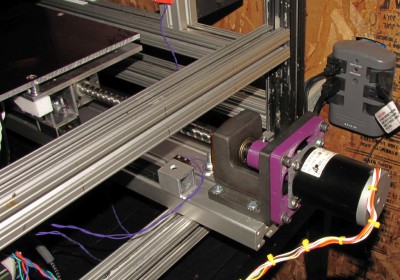
Back side of MegaMax showing motor mount, adapter plate, flexible coupler, and drive screw  in Y-axis.

Back side of MegaMax showing motor mount, adapter plate, flexible coupler, and drive screw in Y-axis.


The ATmega2560 and RAMPS boards will be replaced by a SmoothieBoard.  It has a much faster processor, much better connections for motors/external drivers, etc.  It currently lacks an easy way to add an LCD controller, so I may have to connect to a computer to start prints up (it has ethernet and a built in web server so it can be accessed from any computer on the network).  When a clean way to add an LCD controller becomes available, I’ll add it.  SmoothieBoard review
 

The never-ending 3D printer project

MegaMax has been and continues to be my main project for the last 2+ years.  I am currently working on some upgrades that will make him more Mega and even more Max.  The Y axis is being converted from belt drive to screw drive and the round guide rails are being replaced with linear guides and bearing blocks.  The X-axis will also get converted to linear guide and bearing block and change from 5mm pitch belt to 2 mm pitch belt drive.  I feel confident saying that once these modifications are complete the flaws/errors in prints will be due primarily to the nature of liquid plastic squirting through a nozzle, not positioning system errors.

I recently updated my web site with a sort of historical look at the project, including all the mistakes I’ve made along the way and the often failed attempts at correcting them.  Here is the page that shows how it all started, how it has ended up, and where it is going.  http://mark.rehorst.com/MegaMax_3D_Printer/index.html

Don’t ask me why I do this-  I have no choice.

MegaMax beginning

From this…


MegaMax present state...

To this…