I’ve been on a laser cutting kick lately. In the last two weeks, I made 9 travel coasters, two of which feature neighborhood maps of places I’ve lived. Though I could have just raster cut these very small coasters, generating the vector version allowed me to create this big map of Milwaukee, Wisconsin! This wall hanging map is the maximum size of our largest laser cutter: 24″ by 18″! Boom!
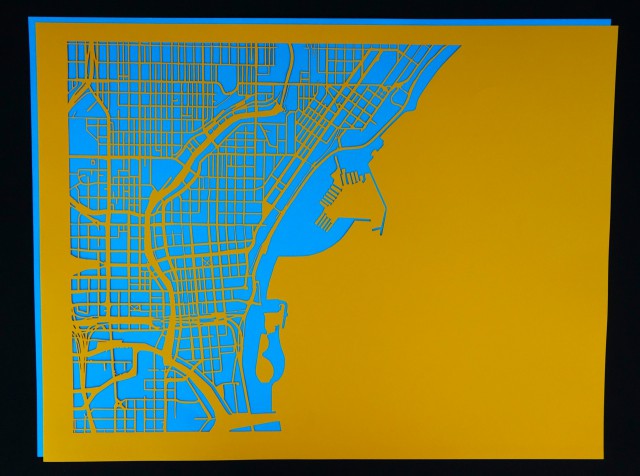
This map was inspired by a project made by my friend NJStacie a while back. While she has both the infinite patience and the limitless awesome that allowed her to use an X-acto knife to cut out all the city blocks of Boston from an actual map, I used a laser cutter and software. To create images for my roadtrip coasters, I simply took screen captures of google maps, and processed them into vector files using GIMP and Inkscape. There are so many extraneous details in google maps (lines for buildings, the text labeling street names, etc), that it was clear I needed an alternate approach for making this map.
Its easy to get a small google map without text labels, check out the url of this page. My first approach to get more than 512×512 pixels was to use the Google Maps API, which is a toolset to imbed an interactive google map into webpages using Java. The great thing about it is that the rendering style is completely configurable. Even better, there is a GUI to quickly configure your desired style, and automatically generate the JSON object to pass to the style property of the MapOptions on your webpage. Instead of investing 10 or 15 minutes reading about how to integrate all these steps, I just created the style, and took a few .png screen captures. I opened them as layers in GIMP and combined them to create the following grey and black image:
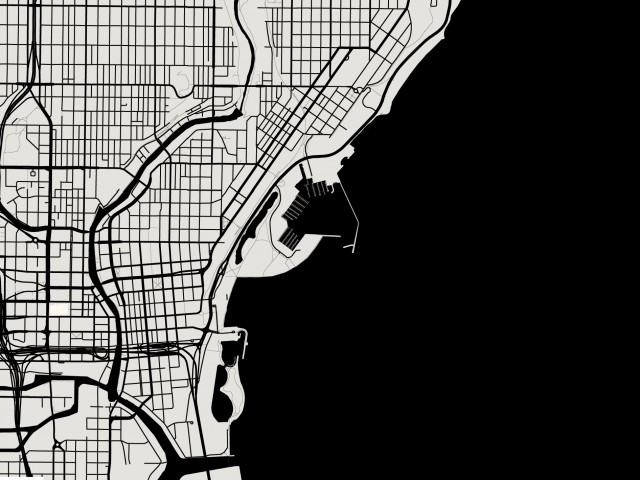
I saved it as a .png, and imported it into Inkscape, selecting Embed Upon Import. I created vector data from this raster image by first selecting Path -> Trace Bitmap, opening a dialog box with many choices. I really only experimented with the top two import choices, Edge Detect and Brightness Cutoff. I found that Edge Detect gives two outlines, one of the streets and one of the city blocks. For this reason, Edge Detect seems to be the best choice to create the widest streets, and therefore the strongest paper cutout. It required some cleanup though, so I selected Path -> Break Apart, adjusted the Fill and Stroke, and then just deleted all the street outlines (thereby widening the spaces between buildings, which is effectively the streets). As some of the streets were to narrow to really form one continuous outline, they formed a lot of smaller street segments that I deleted in five or ten minutes of fast and furious clicking. After all those steps, a vector version of the following image was produced:
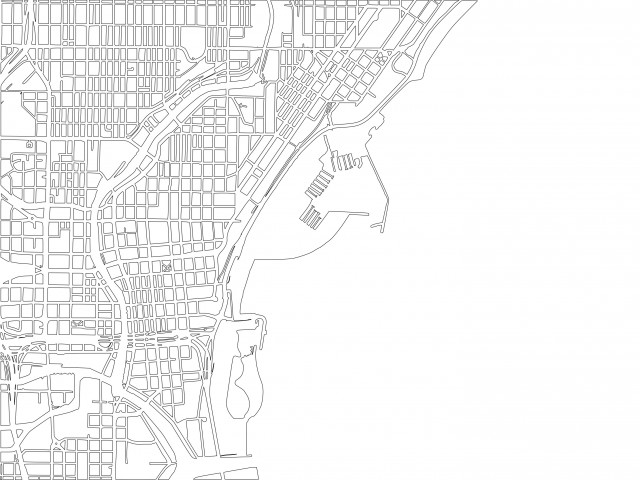
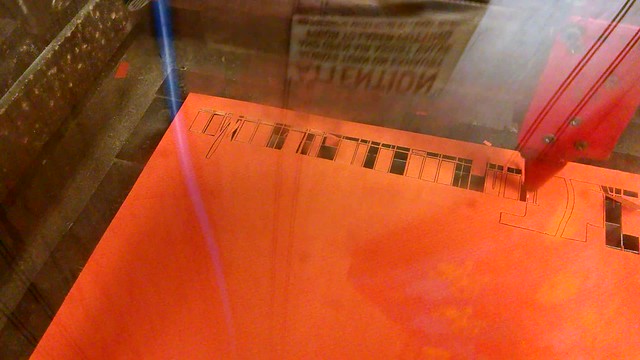
I did a few test cuts to find a power/speed that cut all the way though some colorful, 98lb, 25″ by 19″ acid-free archival paper I picked up. The goal is to use enough power to cut though, without using too much power, which widens the kerf (laser cut width), thereby undesirably narrowing the streets. This ended up being 100% power, with 52% speed. Check out the laser cutter in this real-time (not sped up) video. Note that one typical problem of having both air assist and super-power fume-removal suction while cutting is that the laser cut bits tend to flip over into the cutting path, potentially resulting in an incomplete cut. That meant when the laser cutting was complete, I had to carefully punch out the 15 or 20 stubborn city blocks that weren’t completely cut though.
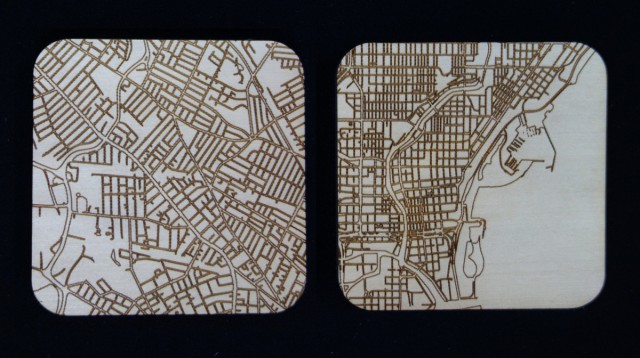
I also cut this design into a coaster, and made one with my old Massachusetts neighborhood too. Naturally this was a lot of data on a small surface, but the results are pretty good despite the vector cutting time approaching that of the raster cutting time! I cut these at 100% power, 100% speed, like the other coasters.
After I completed all these steps, I learned about a way to access vector map data directly. The Open Street Map site allows export of .svg vector data just by clicking the share button on the right side of the page! Even better, one can zoom in to Milwaukee, and press the big green Export button on the upper left to export an .osm database of the visible section of the map. This OpenStreetMap archive can be opened in Maperative! and a style can be applied to the rendered map. Maperative has several styles built-in, and I simply edited the google maps-like style to omit all the buildings, and draw all roads, highways, on-ramps, etc in a black with no border. Maperative can export .svg files, but I found the content of these files are a bit of a wreck. For example, each different road type is a separate vector path, meaning that there are many separate paths in the file. Ultimately I found I’d taken the wrong approach, as I should have rendered all the city blocks as black vector outlines, and omitted the roads – as that is what I really need to laser cut. With a bit more work, using Maperative would likely be a quite quick path from map to laser cutter. However, I abandoned this approach as I’d already created a somewhat reasonable workflow.
Want want want!!!!
I’m guessing you want a laser cutter, not a big map of the MKE!
I would love a print of this. Seriously, how can I get one from you? I live in the area.
Hey Kevin – Ive been working on something similar with the laser cutter at the MakerSpace. I was trying to cut mine out of a thin sheet of wood. Would you be willing to meet sometime and discuss this this?
Excellent! I just emailed you my contact info.
Hi Kevin! I’m creating an interactive map of all the murals in Milwaukee and would LOVE to use your black and white vector of the city as the background for the site. I really think it would be the perfect fit. Could I use it with your permission? I would credit the image to you on the site.
The website is not ready to be launched yet, but please check out what’s up so far to see if you think it’d be a good fit for you.
Thanks a bunch,
Caitlin S
http://mkemuralmap.com
Please do feel free to use the B&W map. I’ll send you a higher resolution jpg and a vector version of it!
Kevin,
This is awesome! I’ve been looking for a vector map of the city to use for some of my personal wedding invites and flyers. Would I be able to use your vector image as well? I can give credit, and I would really appreciate it!
Thanks,
Phil
I PM’d you the .svg file! Thanks for your interest!
I would love to have the vector files you produced of Milwaukee. Thanks.
I PM’d you the .svg file! Let me know what awesome thing you do with it!
I would love this in my living room and I do have access to a large flat bed laser I would be very grateful if you would share the vector file
Hi Dan – I’ve sent you the .svg! Please send a photo of your completed project!
Nice, I found out you can use open street map to get 3d buildings. Often thought of scaling the z axis down on all of them and lasercutting them into layers to build up a city map in 3d!
I love this! I was wondering if I could have your vector file? I’m working on a Milwaukee specific project. Thanks!
Was this vector file ever posted anywhere? Anyone care to share please? :) Thanks!
I would love a high res copy of this, especially the SVG if it is available.