Making a Plunger for a Chocolate Syringe

My latest project is a 3D printer that will produce chocolate objects.  Like many other chocolate printers, it will include a syringe to dispense the chocolate.  Unlike those other printers, the syringe in my printer will have 3.5 liter capacity to enable printing large objects.

The syringe is made from PVC pipe using mostly standard fittings.  One piece that wasn’t standard was the plunger that fits inside the syringe tube and pushes on the chocolate contained therein.  I had to design and fabricate the plunger.  PVC pipe isn’t perfectly smooth or perfectly round inside, so I needed something compliant enough to ride out the pipe’s bumps and constrictions while maintaining a seal.  The seal needed to be tough, yet safe for use with food because it will be in contact with the chocolate inside the syringe.  I found some food-grade silicone casting material and ordered it.

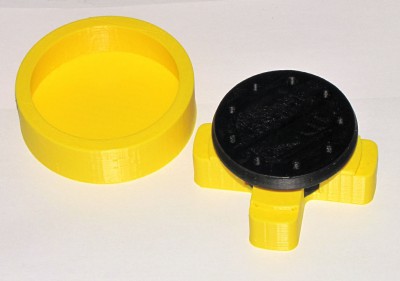
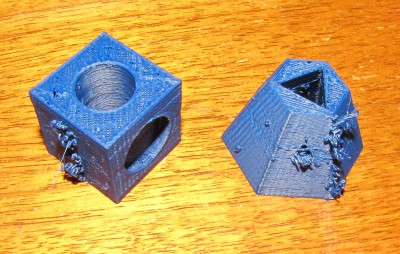
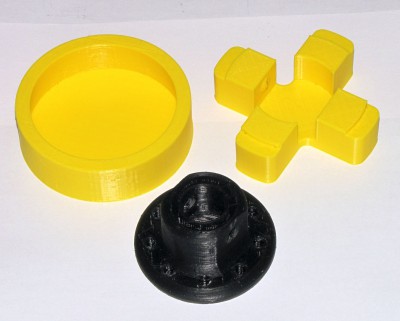
While waiting for the silicone to arrive, I designed a 3D printable core for the plunger and a mold and jig.  The core fits on the end of a linear actuator that will provide the push.  The jig centered the core a few mm above the bottom of the mold.  The mold was tapered and the widest part -the bottom- was a few mm larger diameter than the pipe, and several mm larger diameter than the core.  The silicone envelops the core and is locked in place by holes that connect top and bottom side of the core.  The plunger squeeze-fits into the pipe to maintain the seal against the uneven inner surface of the pipe.

Mold, jig, and core for syringe plunger

Mold, jig, and core for syringe plunger

Mold, jig, and core for syringe showing core inserted into jig.

Mold, jig, and core for syringe showing core inserted into jig.


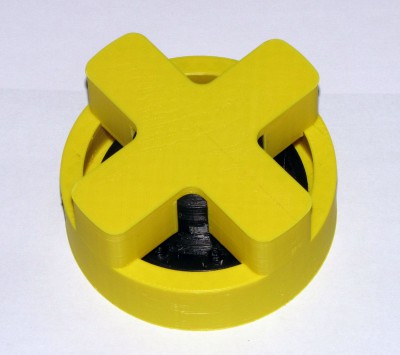
Mold, jig, and core assembled for silicone over-molding.

Mold, jig, and core assembled for silicone over-molding.

I measured and mixed the silicone, coated the core with it and then set the core and jig in/on the mold and let it cure for 24 hours.  Then I removed the jig and broke the now silicone covered core out of the mold.  Result: a perfect, tight fit inside the syringe tube.
Core in mold with silicone.

Core in mold with silicone.


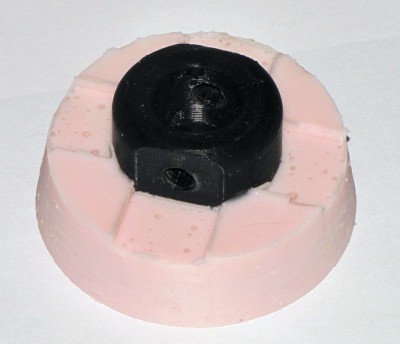
Finished plunger removed from the mold.

Finished plunger removed from the mold.  The mold had to be broken off by design.


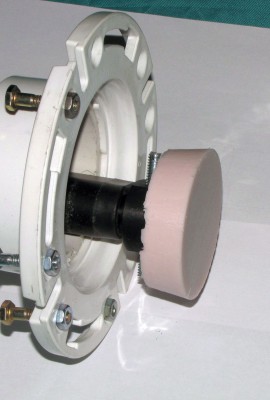
Plunger mounted on linear actuator.

Plunger mounted on linear actuator.


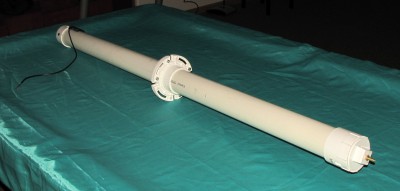
The assembled syringe.

The assembled syringe.

SnakeBite Extruder Works!

I repaired the Budaschnozzle hot-end over the weekend and bolted the SnakeBite extruder to it and then to MegaMax and tested it last night.  There’s plenty of tuning to do, but the first print looks promising:


Start of SnakeBite’s first print


More of SnakeBite’s first print


Not too pretty but it shows promise.

Not too pretty but it shows promise.

Snakebite Extruder Testing

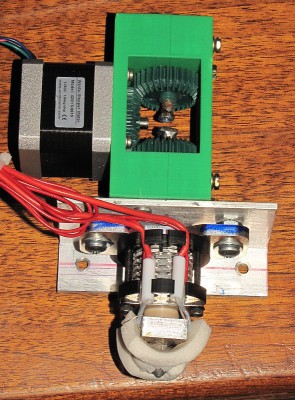
rev7 extruder with hot-end


One of the biggest problems with FDM 3D printing is hot-end jamming.  There seem to be a lot of causes, most of which are not readily identifiable when a jam occurs.  One thing I have found is that after a hot-end jam I can usually grab the filament and manually push it and get it flowing through the hot-end again, though it is too late to save the failed print.  The most common means of driving the filament into the hot-end is to pinch the filament between a gear and a bearing and have a motor drive the gear, either directly (with 1.75mm filament) or via a gear reduction/torque multiplier arrangement (3mm filament).  When the hot end jams, the large force applied by the gear over the small area of the filament that is pinched between the gear and bearing usually chews a divot in the filament thus destroying the grip.

A couple weeks ago I started designing a 3mm filament extruder for 3D printing.  My hope is that this extruder will provide sufficient force on the filament to prevent hot-end jamming from ruining prints.  My design uses two counter-rotating 6-32 nuts twisting on the filament (like the way your hands twist in opposite directions when you give a “snakebite” to your friend) to drive it into the hot-end.  One is a normal, right-hand threaded nut, the other is left-hand threaded.  When the nuts turn in opposite directions, the torque that would try to twist the filament is cancelled while moving the filament forward and reverse without twisting.

The motor has to turn about 1.26 times to move 1mm of filament so there is a huge torque to axial force conversion.   The gear diameter is about 30mm.  That 1.26 rev moves the gear about 119mm at its perimeter.  That means there is about a 119:1 increase (ignoring losses in the gears, bearings, and nuts) in the force at the filament compared to the force at the gear.  That force is applied over a larger area of the filament than the usual pinch arrangement, so it is less likely (I hope!) to carve the filament and lose grip.  I tried stopping the filament by grabbing it with my fingers and holding as tightly as I could but it didn’t even slow down.

The firmware in the printer has to be tweaked so that it knows exactly how many steps of the motor are required to drive 1mm of filament.  The formula is:

32 rev/ 1 inch  X     1 inch /25.4 mm   X    200 steps/1 rev    X  16 microsteps/1 step   =  4031.496 microsteps/mm

For initial tests I just input 4031.5 using the rotary encoder on the LCD interface to the RAMPS board in MegaMax.

Here are the parts that I used:

Left hand threaded tap:  http://www.amazon.com/gp/product/B006YITGY8

5mm brass tubing:  http://www.ebay.com/itm/360828686174

5x16x5mm (625Z) bearings:  http://www.ebay.com/itm/321062568303

Plastic gears:  http://www.sciplus.com/p/PLASTIC-GEAR-SET-WITH-BUSHINGS_40234

I also used a NEMA-17 motor from a QU-BD extruder.

You can DL the STL files for the printed parts here:  http://www.thingiverse.com/thing:261037

Test printing will start in the next day or so and I will post another video showing success or failure.

Fingers crossed!