Electric Ice Scooter

DSC_0424

When I recently was at the thrift store and saw a pair of ice skates next to a kick-scooter, it got my mind going. “What would a scooter look like with skates in place of wheels!?”

The next time I was at the Makerspace, I saw my old electric scooter over on the Hack Rack. This was a scooter I originally rescued from a dumpster. Although it didn’t have batteries, just adding power and a little tinkering got it up and running again. A few of the EV Club and PowerWheels Racing guys played around with the scooter a bit, but eventually the controller got toasted, and who knows what happened to the front wheel.

Oh well, I’d be replacing that front wheel with an ice skate anyways.

Turns out that the heel of an ice skate is actually sturdy enough to drill right through and use as a mounting point. I simply  drilled through the skate, inserted a spacer, and then ran a 3/8″ bolt through the skate and the front fork of the scooter. I finished it off with a couple of washers and a nut.

Then next thing to fix was to get the  motor going again. Turns out that it’s a brushless motor. While I have a fair amount of experience now with BRUSHED motors, this was my first experience with brushless. I did a little research, and then ordered a 24V, 250 watt generic brushless controller from a mail-order scooter parts company. Unfortunately, it used a different style of throttle than what was already on the scooter, so I had to order a throttle to match.

Connecting the controller was pretty easy, three wires to the motor and the black and red one to power. I first bench-tested it with an old printer power supply, and once everything was working right, bit the bullet and bought a brand new pair of 12ah SLA batteries. The two batteries are wired in series, along with a 20 amp fuse, and then go to the controller.

I still needed a deck for the scooter. I dug through some scrap materials and found a pair of cabinet doors that were about the right size. I cut them down just a bit and bolted them to the scooter. I even re-mounted a cabinet door handle to have as an attachment point for towing a sled.

With that, I was ready to go for a test ride, so it was off to the lake. Once I was on the ice, I turned on the scooter and gave it a go! What fun! It really zipped along, but it was almost impossible to steer, as the back tire would slip right out from under me! Time for more traction!

I decided to make a spiked tire. I removed the rear wheel, then disassembled the two-part rim and removed the tire and inner tube. I stuck 1/2″ self-tapping, pan-head, sheet-metal screws through the tire from the inside, so that their points stuck out.DSC_0394 I evenly spaced out 24 screws and alternated them to be slightly off-center side to side. Next, I put some old scrap bicycle inner tube over them as a liner to protect the scooter tire inner-tube. After that, it was just a matter of reassembling everything.

Now for test #2 out  on the ice. Remembering how much it hurt to fall on the ice, I was prepared this time by wearing my motorcycle jacket (which has padding built-in) and my helmet. Good thing too, as I would learn while steering with one hand and holding a GoPro camera in the other…. (Note to self, keep both hands on handlebars at all times.)

Overall, the Ice Scooter works great! I still have a few little things to do on it. For example, the motor is running “sensor less”, and I’d like to learn about how brushless motors use the sensor system. I’d also like to get a small 24V dedicated charger. As it is right now, I have to remove the deck and manually charge with a little 12V charger.

From thrift store idea, to hack rack, to life on the ice, it’s always fun to see what you can do with just a little ingenuity. I hope you like this project. If you want to see more on it, please check out the write-up I did on Instructables. It’s even in a few contests there, and I’d love your vote!

Keep on Making,

-Ben

The Milwaukee Makerspace Theater

BIG_HMMMMMM2

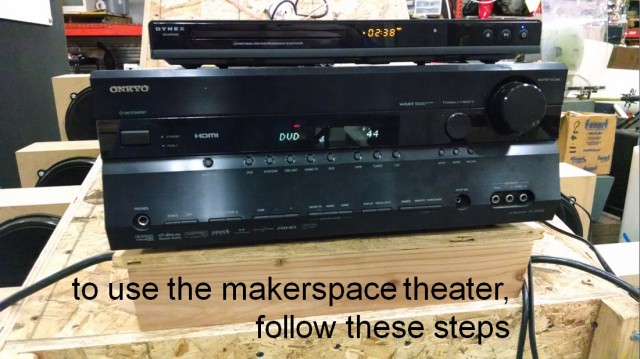
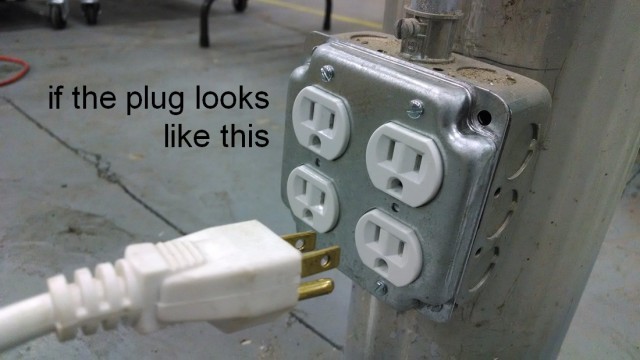
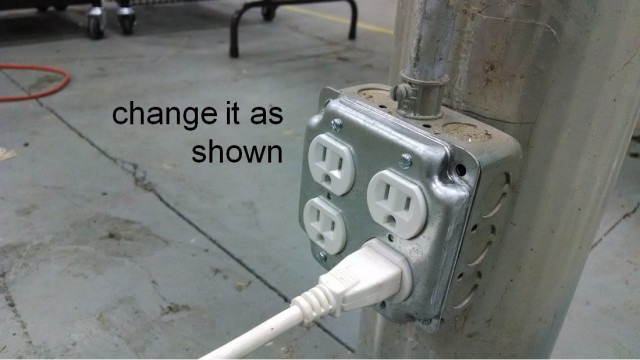
Around 25 members have hopped in the new Milwaukee Makerspace Theater after the last two Tuesday meetings.  Its up and running in a “no hearing protection required” way!  The bass still goes way down to subsonic tones, but its being powered by a small & sensible surround sound amp.   Its a very immersive audio experience, and likely sounds much better than any 5.1 system you’ve heard because there’s only one seat!  The sound has been optimized for the single theater-goer: You!  The theater is hooked up to a DVD player, and is available 24/7  for any member to watch a movie in: no check-out required.   Note that any video source you have can be hooked up via the HDMI cable.  Alternately, you can follow the lead of JasonH, who used the theater with a portable audio player to rock out while he worked on his own project near by. See the photos below for the simple instructions on how you can start up the theater, and feel free to take a break from making by using the theater!

123456789

Home Theater with Insane Subwoofer

After the mediocre commercial successes of some of my previous audio products, I decided to pursue a project that has absolutely no commercial potential.  Although my Automated Gmail Assistant had a 0.1% view to purchase rate, they definitely delighted their new owners!   On the other hand, my novel audio surround sound processor, audio-visual processor and audiophile headphones did not produce any revenue, despite being manufactured in an exclusive edition of one each.  Not to be discouraged, the goal of this project was to expand on the core idea behind the aforementioned audiophile headphones, but to overcome the main two drawbacks of using headphones:  1) Many people find that headphones are too uncomfortable and impractical for long term listening. And 2) most headphones lack the concert-like visceral bass impact, which is that feeling of the kick drum shaking your chest that only rock and roll shows could provide.

BIG_HMMMMMM2

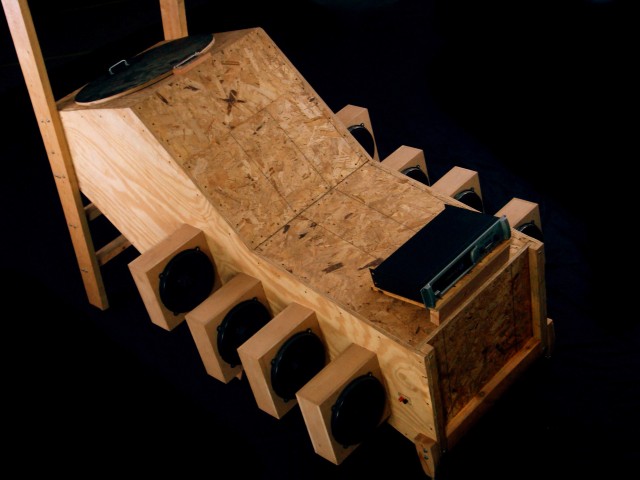
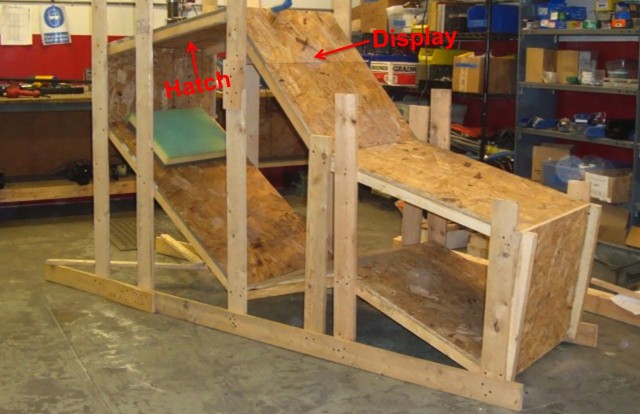
Simply put, the Humorously Maniacal Milwaukee Makerspace Multimedia Machine (HMMMMMM) is a personal sized movie theater, with 5.16 surround sound.  That’s right, this theater is like a conventional 5.1 home theater, but with 15 extra subwoofers to delight the senses. While the bass in a live concert can be felt in your chest, the bass in the HMMMMMM can be felt in your soul(!).  In addition altering listener’s consciousness, the HMMMMMM will soon be used to screen our yet-to-be-filmed Milwaukee Makerspace orientation video as an integral part of our onboarding process for all new members. The HMMMMMM measures about 7 feet long and about 4 feet wide.  An eager movie-goer can simply climb up the integral stairs (shown on the left) and jump in through the 27” diameter escape hatch in the top of the HMMMMMM. Despite its crazy appearance, the HMMMMMM offers a surprisingly comfortable reclining position, much like that of a lazy-boy.  Check out this photo of the HMMMMMM under construction for a better idea of the ergonomic internal layout: There is a pillow for one’s head, and ones feet extend to the right.  The 27” display is mounted to the angled portion on the top surface, about 24” from the viewer.  Eventually, two 24″ monitors will expand the visual experience into the periphery.

The_Incomplete_HMMMMMM4

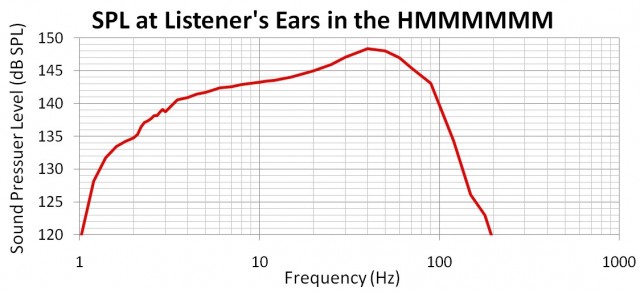
The audio portion of the HMMMMMM is a 5.16 system.  The high frequencies are played by 5 uninteresting Swan/HiVi speakers that are arranged in a properly boring 5 channel surround configuration.  The more exciting portion of the audio system is the subwoofer – well, the 16 (Sixteen) 10″ high efficiency subwoofers that provide that TrueBass™ sensation the masses crave.  Its clear from the use of 16 subwoofers that one object of the HMMMMMM was to create an audio system that plays low bass.  Playback of really low bass typically requires an extremely large speaker box, and still notes as low as 20 Hz are rarely audible.  However, inside any speaker box the bass response is naturally flat to much lower (subsonic) pitches.  For more on the sound pressure level inside and outside speaker boxes, check out this link.  The graph below is a measurement of the SPL or sound pressure level (how loud it is) versus frequency (pitch) at the listener’s ears in the HMMMMMM.

SPL_in_HMMMMMM

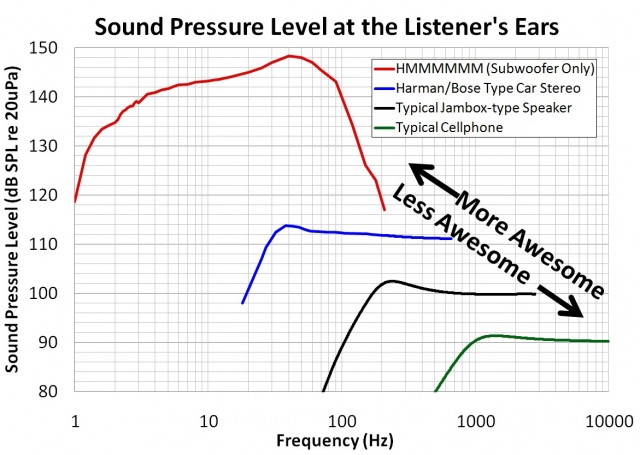
The graph shows that with a sine wave input, the SPL inside the HMMMMMM is 148.6dB at 40 Hz.  That means the acoustic pressure on the 27” diameter escape hatch is 45 pounds.  Excellent.  Note that earplugs in addition to earmuff style hearing protectors are mandatory to safely experience the TrueBass™.   To understand this strict hearing protection requirement, lets compare the sound pressure level inside the HMMMMMM to other audio systems that may be more familiar.  Note that the loudness of these other audio systems are not visible in the graph above, because essentially all other audio systems (including yours) are inferior.  Adjusting the margins of the graph a bit produces the following graph:

SPL_of_many_systemsThe plot shows how loud typical audio systems are, and how low they play.  For example, cellphone speakers play only a bit below 1khz, and are ~90 dB if they’re 40cm from you.  When a Jambox-type bluetooth speaker is about 60cm from you, it plays ~10 dB louder, and another 1.5 octaves lower, to 200 Hz.  Typical bookshelf speakers can get another 5 dB louder if you’re 1.5 meters from them, but only play down another octave to 100 Hz.  OEM installed car stereos are a big improvement, but they’re still not in the same league as the HMMMMMM.  Yes, the IASCA record holding car is louder than this, but it plays only from 50 Hz to 60 Hz, which isn’t even really bass.

Note that the difference in loudness between a cellphone and a car is 20 dB, while the HMMMMMM is 30 dB louder than a high-performing car stereo.  Also note that the frequency range of a piano, with its 88 keys, is about the same as a bookshelf speaker – a bit over 7 octaves.  Surprisingly, the subwoofer portion of the HMMMMMM has a 6 octave bandwidth, but it plays the 6 octaves you’ve never heard before!  The HMMMMMM plays 6 octaves below what your bookshelf speaker or Jambox calls bass. The HMMMMMM has a +/- 6 dB passband extending down to 2 Hz, with the output at 1 Hz being nearly still above the 120 dB “threshold of pain.”

Disclaimers: For safety, the big 2000 Watt amplifier that drives the HMMMMMM to its full potential is not available when the author is not present.  Ironically, the author has taught 75-100 people, the eager early HMMMMMM listeners, how to properly insert earplugs, meaning that the HMMMMMM is actually a learning tool for hearing safety! Finally, the author has some hesitancy in having the HMMMMMM reproduce recordings with 5 Hz content at 140 dB, because typical hearing protection has little effect at these unnaturally low frequencies.

PS:  Please don’t hesitate to contact me if you’d like to help with the video scripting, filming or editing.

Featured on Hackaday

Hackaday

The fine folks at Hackaday stopped by for a tour recently, and they made this fine video so you to can see the awesome power that is Milwaukee Makerspace all the way across the Internet-Tubes in your own home or workplace.

And if you’re in town for a visit and want to see the place, Tuesday or Thursday night at 7pm is a great time to stop by. (Those are the “open” nights.) Otherwise, hit up the mailing list and find a member who might be available some other time, like the weekend, or Wednesday at 2:45am. Or something like that.

(And yes, we do have a giant robot arm capable of crushing innocent metal chairs.)

Exercise Bike Generator

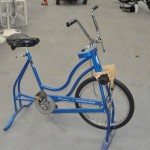
I’ve always been impressed with exercise bike generator displays at renewable energy exhibits. So, a while back, when I saw a classic Schwinn exercise bike at the thrift store, I nabbed it with the plan to make it into an EXERCISE BIKE GENERATOR!

Earth Week is only a week away, and since our local eco-group is hosting a BIKE-THEMED event this year, I thought I’d “get in gear” and quick put together a bike generator.

I really already had all the parts needed. Mostly, that’s a bike and a permanent-magnet motor. Besides that, it’s just some scrap wood, a bolt, nuts and washers and a bungie-cord.

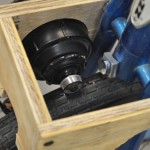
At the heart of the project is a 12V electric motor. I still had a few parts left over from my electric car conversion project, including the electric radiator fan. My electric car didn’t need an engine or radiator, so I set the fan motor off to the side for future use. I pulled it out for this project. First, I had to remove the plastic fins, which were practically cast in place. I managed to remove them, and get it down to an aluminum hub mounted on the motor shaft.

Next, I cut a scrap of plywood, and used a hole-saw to make a hole in it big enough for the motor to sit in. I put the motor in place, and attached it with three small wood screws.

I drilled a 3/8″ hole through the corner of the plywood, and ran a long bolt through it into the front frame of the cycle. That way, I was able to test alignment of the motor shaft with the front wheel. It matched up pretty well. I would just need to smooth out the hub on the driveshaft and add a stabilizer and tensioner to the motor.

The hub on the driveshaft was bumpy, which made a lot of vibration on the exercise bike tire, and the gear ratio was just a hair off. If I could trim down the diameter of the hub a bit, it would smooth out the ride and allow me to pedal just a tad slower while at the right speed for 12V charging.

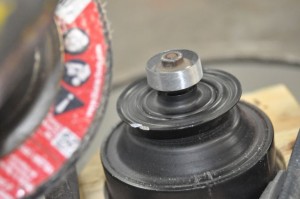
I did NOT have a lathe handy, so I thought it would be pretty tough to smooth out the hub. That’s when I realized there was nothing stopping me from JUST SPINNING THE MOTOR. So, I clamped the motor down to a work-table, grabbed the jumper cables from my truck and a 12V battery, and just spun-up the motor! I then used an angle-grinder (with a flapper disc) to smooth down the hub, and reduce its diameter a bit. Because it was spinning at high speed, it came out perfectly concentric and balanced. Not bad for an improvised “poor-man’s lathe”.

DSC_6313

I put the motor back onto the cycle and added another piece of plywood opposite of it and a cross-piece to made a basic box shape. This holds the motor solid and lets it swing up and down but NOT side to side.

At that point, all that was left was a tensioner. I added a drywall screw to the wood and attached a bungie-cord from it to the base of the cycle. That applies a light, but steady, force of the motor against the wheel.

I clipped my volt-meter to the two wires coming off the motor and pedaled. Sure enough, it was pretty easy to pedal at a rate that gave me an output voltage between 12-14 volts, what’s needed to charge a 12V battery.

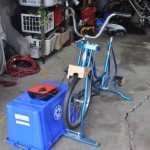
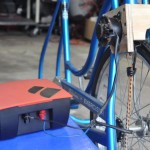
After that, I hooked it up to my Fenix Intl. Ready Set – a 12V battery with built-in charge control and 12V and 5 outputs. It also has a nice charge indicator light on it, and universal power input on the back, meaning I could just run my bare wires straight in and tighten them down without even needing tools. I then only have to pedal fast enough until the “Now Charging” light comes on to know what speed I need to maintain for 12V charging.

This isn’t exactly a fancy or high-power exercise bike set-up, but it sure was easy to build. I did some testing, and it’s simple to output 10 watts of energy. That’s just about perfect for charging an iPad. That also means it’s pretty easy to do something like designing a setup where if you want to watch a movie on the iPad, you have to pedal to make it happen!

Just think how much more fit the average American would be if we all had to pedal to watch TV!

This project took about an afternoon of work and cost me $8, the cost of the cycle at the thrift store. I already had the motor, nuts and bolts, bungie-cord and scraps of wood. All in all a nice little weekend project.

Have you built your own exercise bike generator? What do you power with it? What did you do different on your design? Let us know!

Take care, and keep pedaling!

-Ben